DIY Long-term Weatherproof Time Lapse Rig
In fall of 2017, I had the opportunity to capture the transformation of an empty plot of land turning into a high-tech vehicle test track. The bulk of the construction would take place for about a year. My friend and colleague, Ryan, and I were tasked with capturing that transformation into a timelapse video.
We wanted a high-up vantage point to place a camera. The site is at an airport, so there was a neary airline hangar where we had access to the roof. With that established as our best vantage point, we had to decide what kind of camera to use.
Here were the challenges
- The camera needed to be weatherproof, since we would be leaving it outside for many months, through a Michigan winter and summer.
- We would only be able to visit the camera about once a month
We considered security cameras, point and shoots, DSLRs… everything. We landed on an entry level DSLR because it was going to give us the best image quality for the price (and the most control), and a cheaper DSLR camera would be better since there was definitely a chance of the entire rig being ruined by exposure to the weather.
At some point, I had run into a webpage where glacier researchers built a weatherproof rig that was left out for months at a time. Since then I’ve seen a few instances where this technique was used. We used this as our guide to construct a rig that would get what we needed.
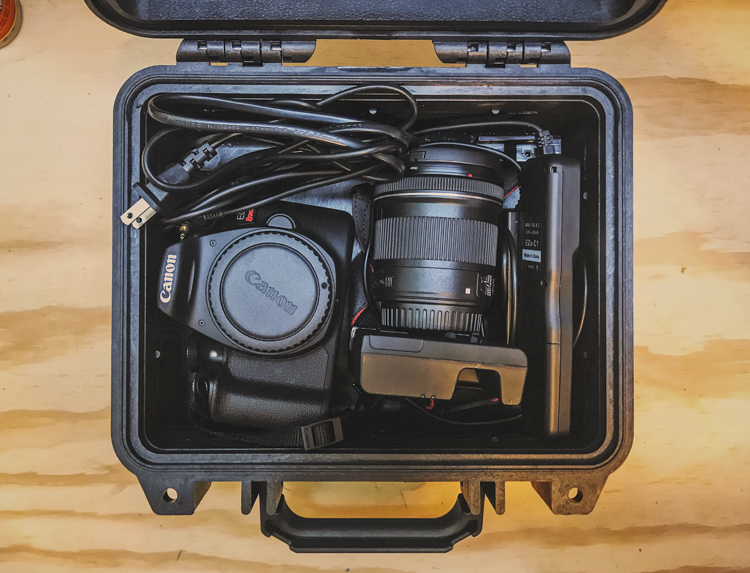
Here’s a list of the gear we used to build the rig:
- Canon Rebel t6 Camera Body [link]
- Canon 10-18 lens [link]
- Pelican Case 1200 [link]
- Dummy battery for Canon t6 [not the same product, but similar]
- Intervalometer [link]
- Old heavy tripod
- Ball head – more on this later [link]
- 20 lb weight
- 3.5″ PVC Pipe
- 82mm UV filter
- Old lens hood
With the intervalometer and the dummy battery, we could leave the camera on, non-stop, capturing photos at timed intervals. The glacier researchers did one photo per day. We decided to do one photo per hour, with the thought that it would give us more opportunities to use photos to better show the construction process. If we wanted to do one photo per day, we could just use every 24th photo.
It was time to go to the shop and put the rig together.
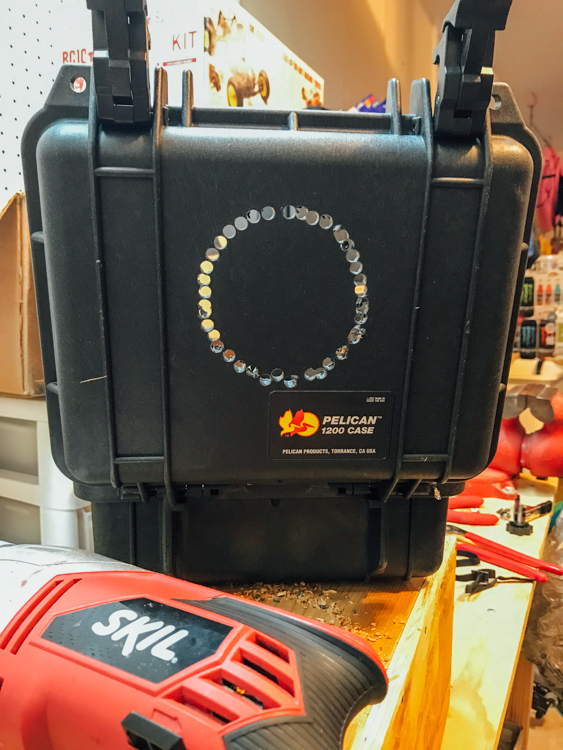
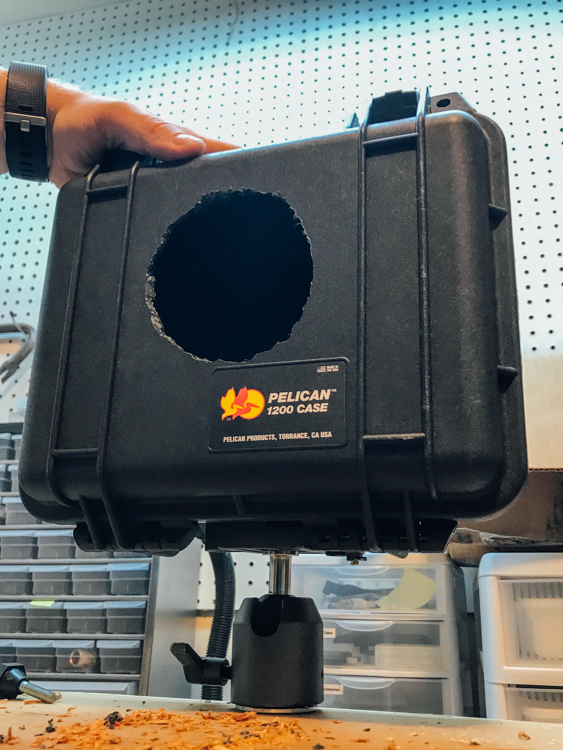
The first step was to install the lens port in the front of the Pelican case. To do this, I used a power drill to make holes in a circle to fit the 3.5″ PVC pipe, after marking where the lens would protrude out of the case. It had to be a tight fit, so this took some time. Pelican cases are not easy to “destroy”! 😉
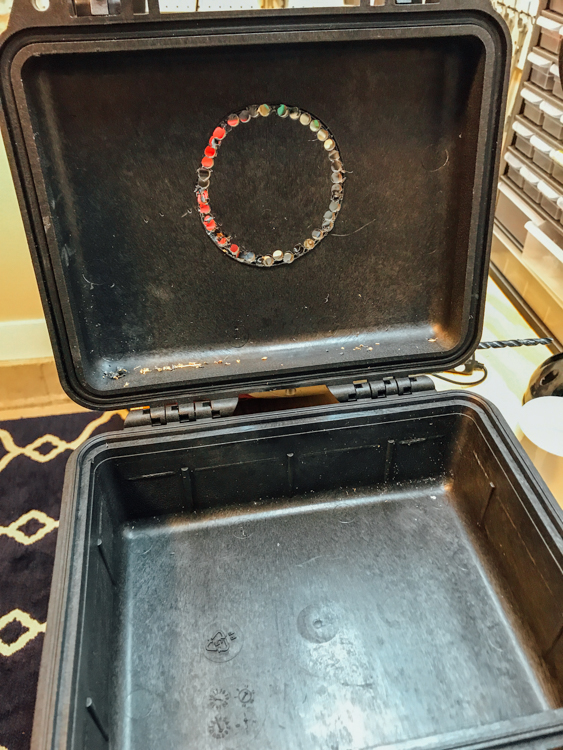
We were making progress!
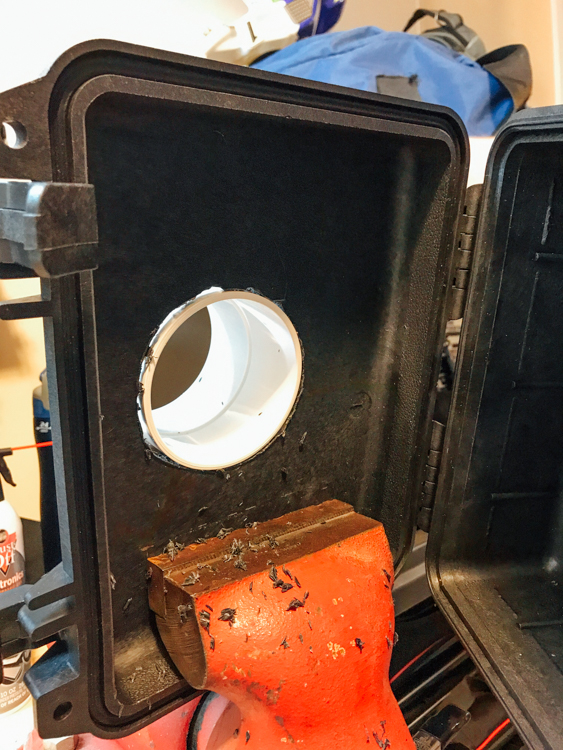
The next task was to seal the PVC pipe to the pelican case. I used gorilla glue to make a solid connection between the two. Caulk was then added to the seam on the outside, and hot glue was applied to the inside to strengthen the seal. The UV filter was added to the front, and sealed with more glue and caulk. Helpful tip: getting glue on the lens of the filter will be hard to remove later. I covered the glass with masking tape until construction was complete.
After the port was completely dry, we began working on the mount that would hold the camera in place when the case was closed.
We used two steel L-brackets to hold a wooden platform in place. Both the wood and the brackets were just laying around in my shop, but they worked great. The two L-brackets were bolted to the front of the case through pre-drilled holes. These were then covered with calk to seal the holes.
In the center of the wood platform, we drilled a hole to insert a 1/4″ screw that held the camera securely to it. At this point, the camera was connected directly to the front of the case, and was secure when we closed the case. We did a light shake test to make sure everything was nice and tight.
To connect the case to the tripod, we pre-drilled a hole to insert another 1/4″ screw down to a tripod baseplate. The ball head we used was one we had on-hand, but if I were to do this in the future I’d pick a more secure head. Again… more on this later.
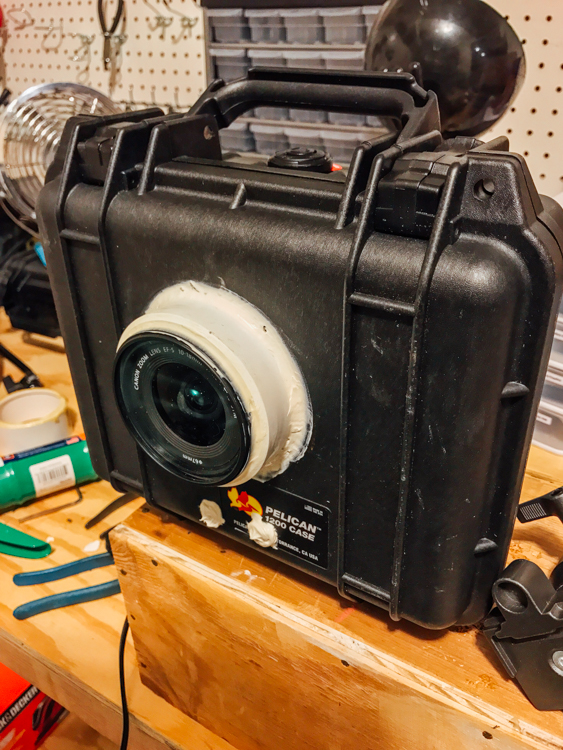
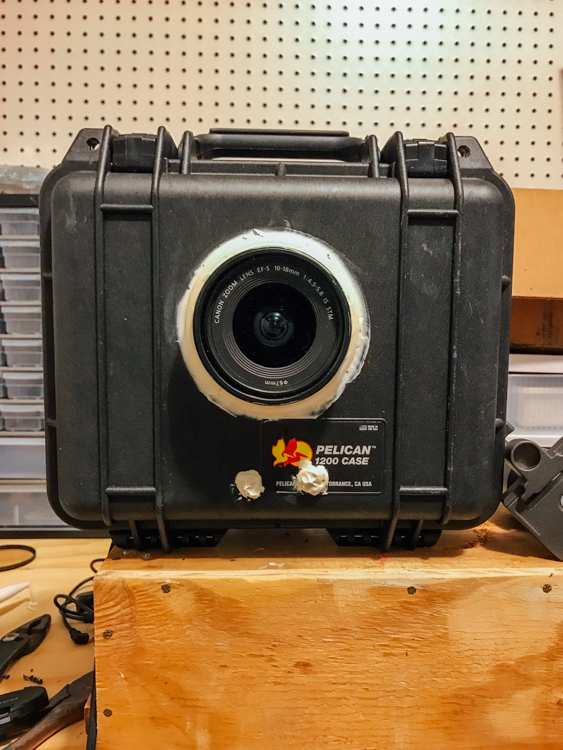
The lens port was installed, the camera was bolted to the inside of the case, and the case was successfully attached to the tripod. The only thing left to do was drill a hole in the bottom of the case for the dummy battery cord. Again, glue and caulk was applied to seal the hole.
All of this took a few days, as we had to wait for different parts to dry before we could continue.
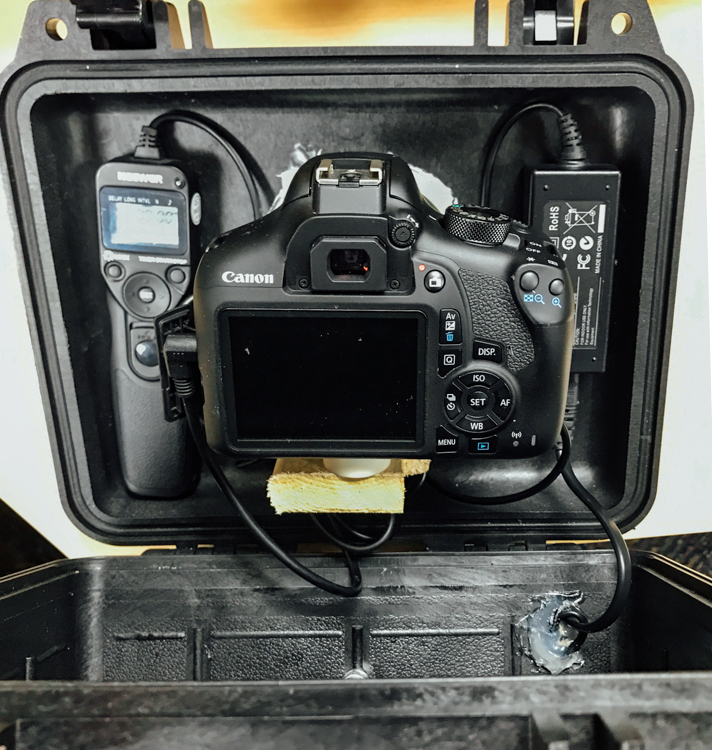
The intervalometer and the AC adapter for the dummy battery were both attached inside the rig via double-sided tape. Because of the heat that the rig would eventually endure, the tape’s stickiness would melt and by the end they were both sitting at the bottom of the inside of the case, but it did not change the images.
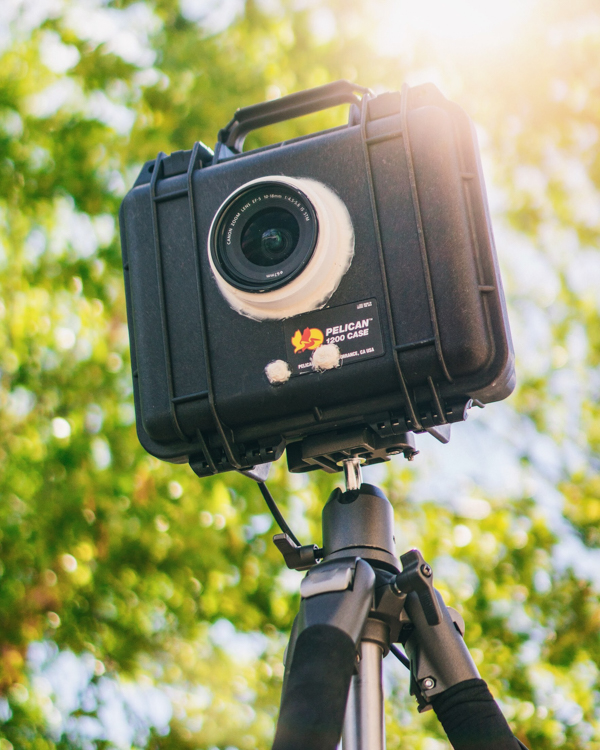
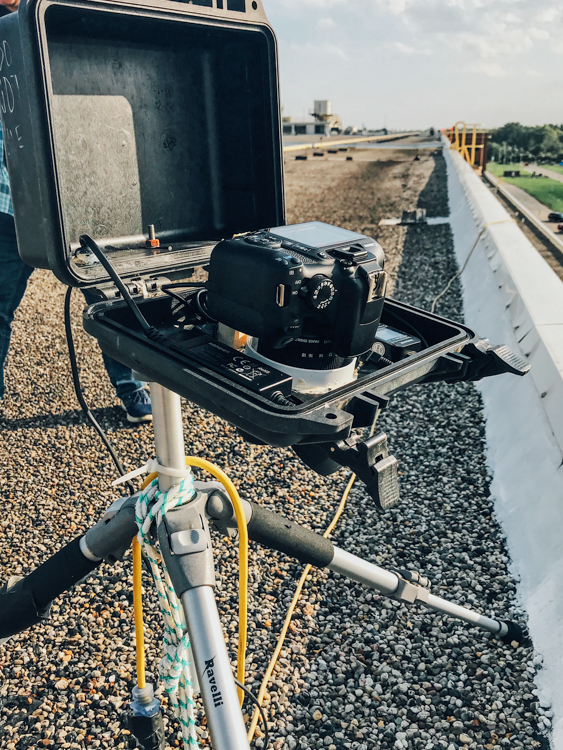
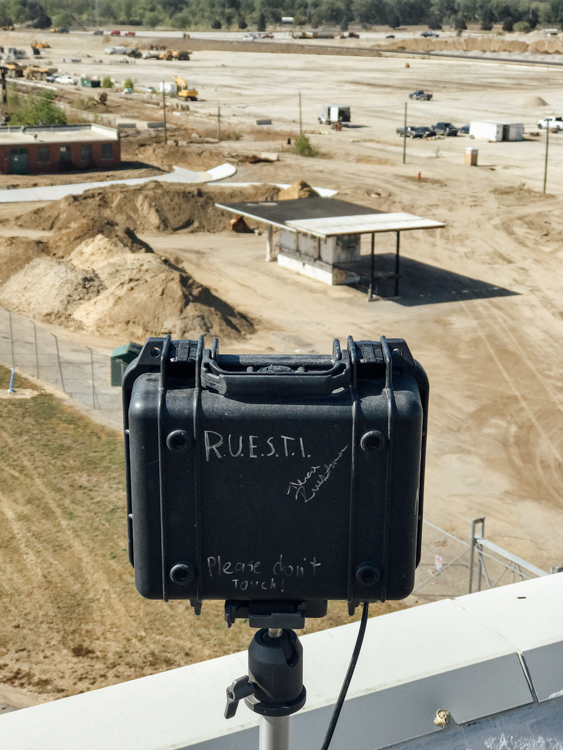
With the rig build complete, we set it up on the roof of the hangar, plugged it in to a nearby outlet, and weighed the tripod with a weight to prevent movement from wind. The intervalometer was set for 1 hr increments, we closed up the case and … left it there for a month.
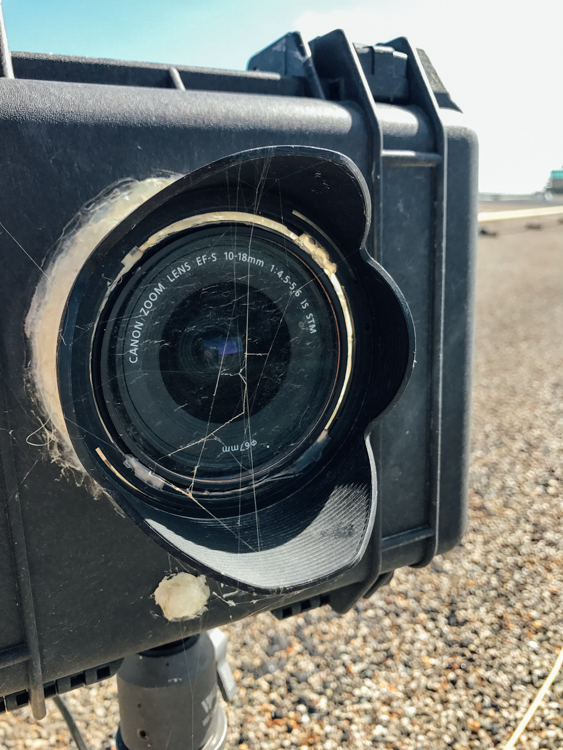
The first time we checked on it there was virtually no wear on the case and the camera was still working, but after a few more months we encountered cobwebs, bird activity, a scrap piece of paper that somehow found its way into the lens hood, and more. But… for the most part, the lens was clear of debris and we were getting good results.
The biggest challenge was adequately capturing the construction progress from our vantage point. We weren’t up high enough to see a lot of the progress outside of a thin strip on the horizon. Fortunately the images were really big and we could crop in to different areas throughout the time lapse.
After more than a year, we collected the rig and began processing photos. Here is a demo of all the images captured:
The Results!
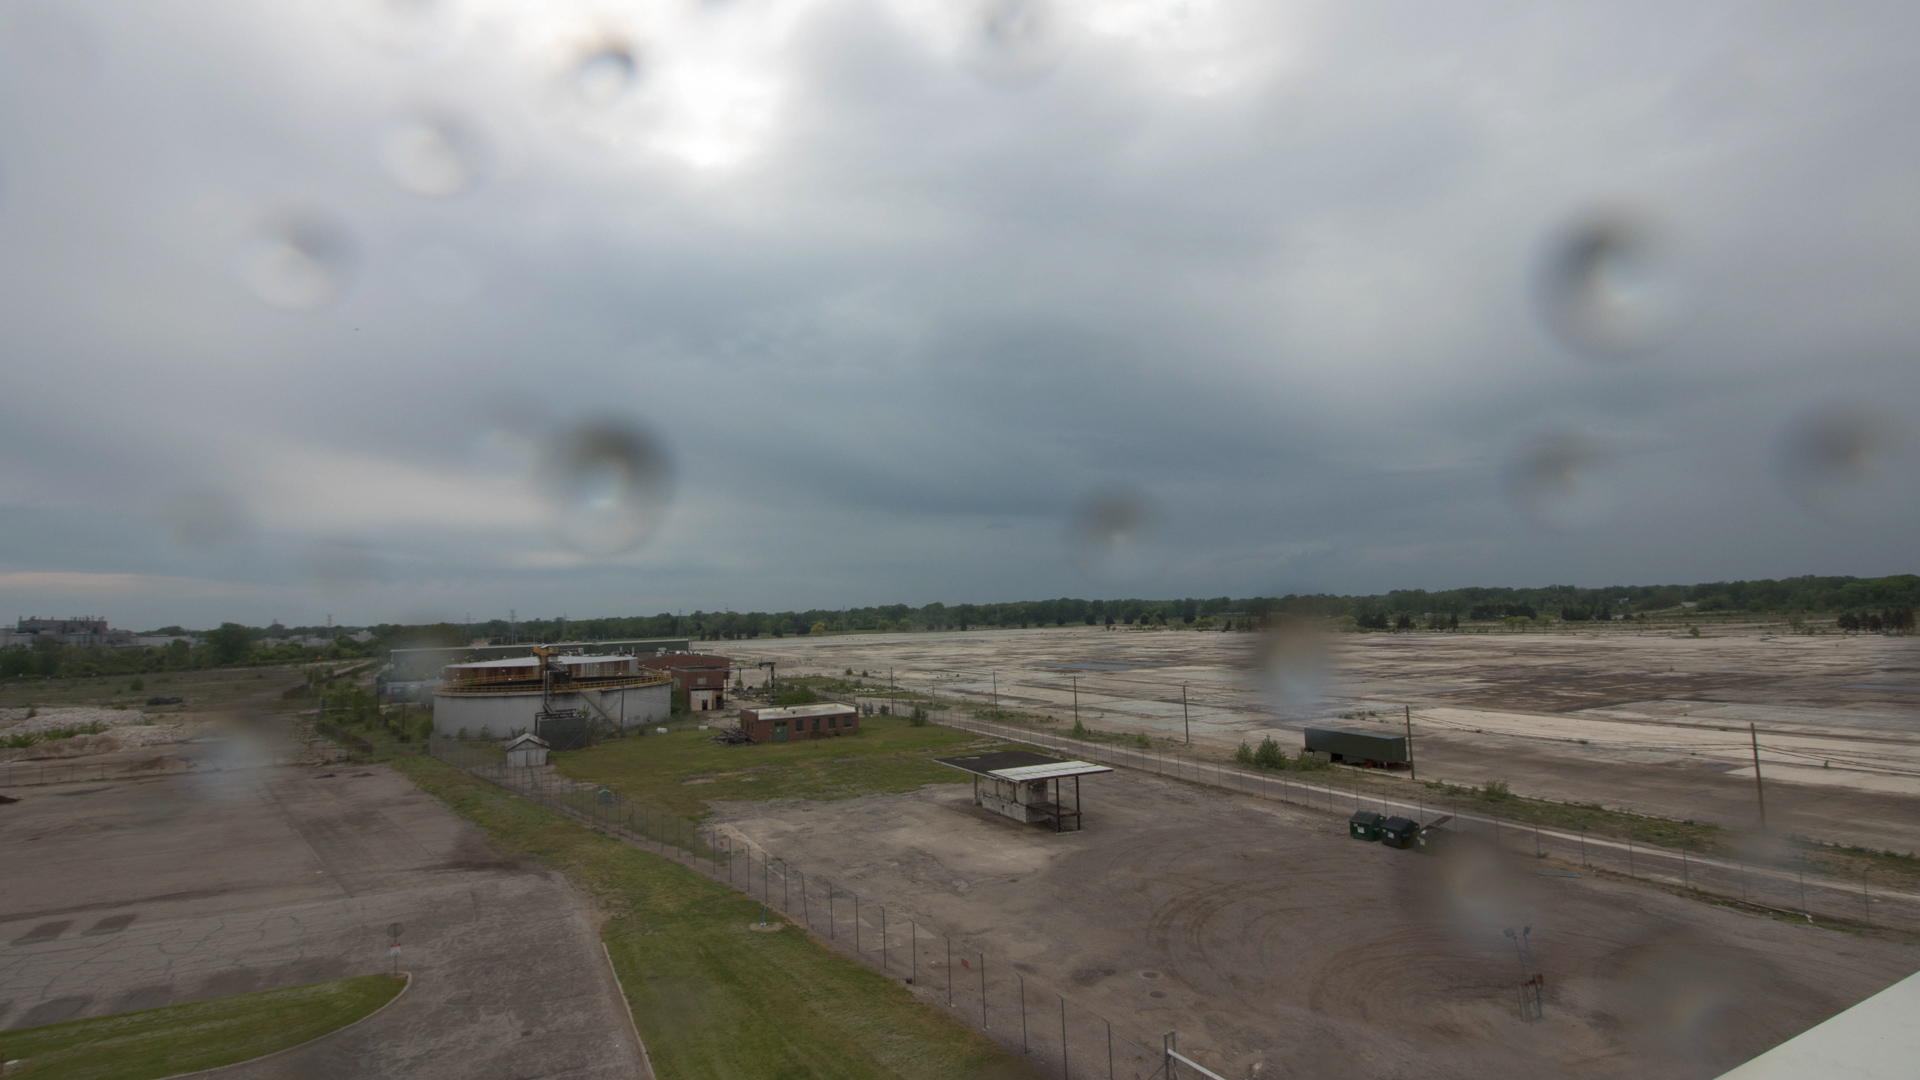
We had a lot of great photos, but also a lot of bad ones. Some with rain on the lens…
… some with frost on the lens…
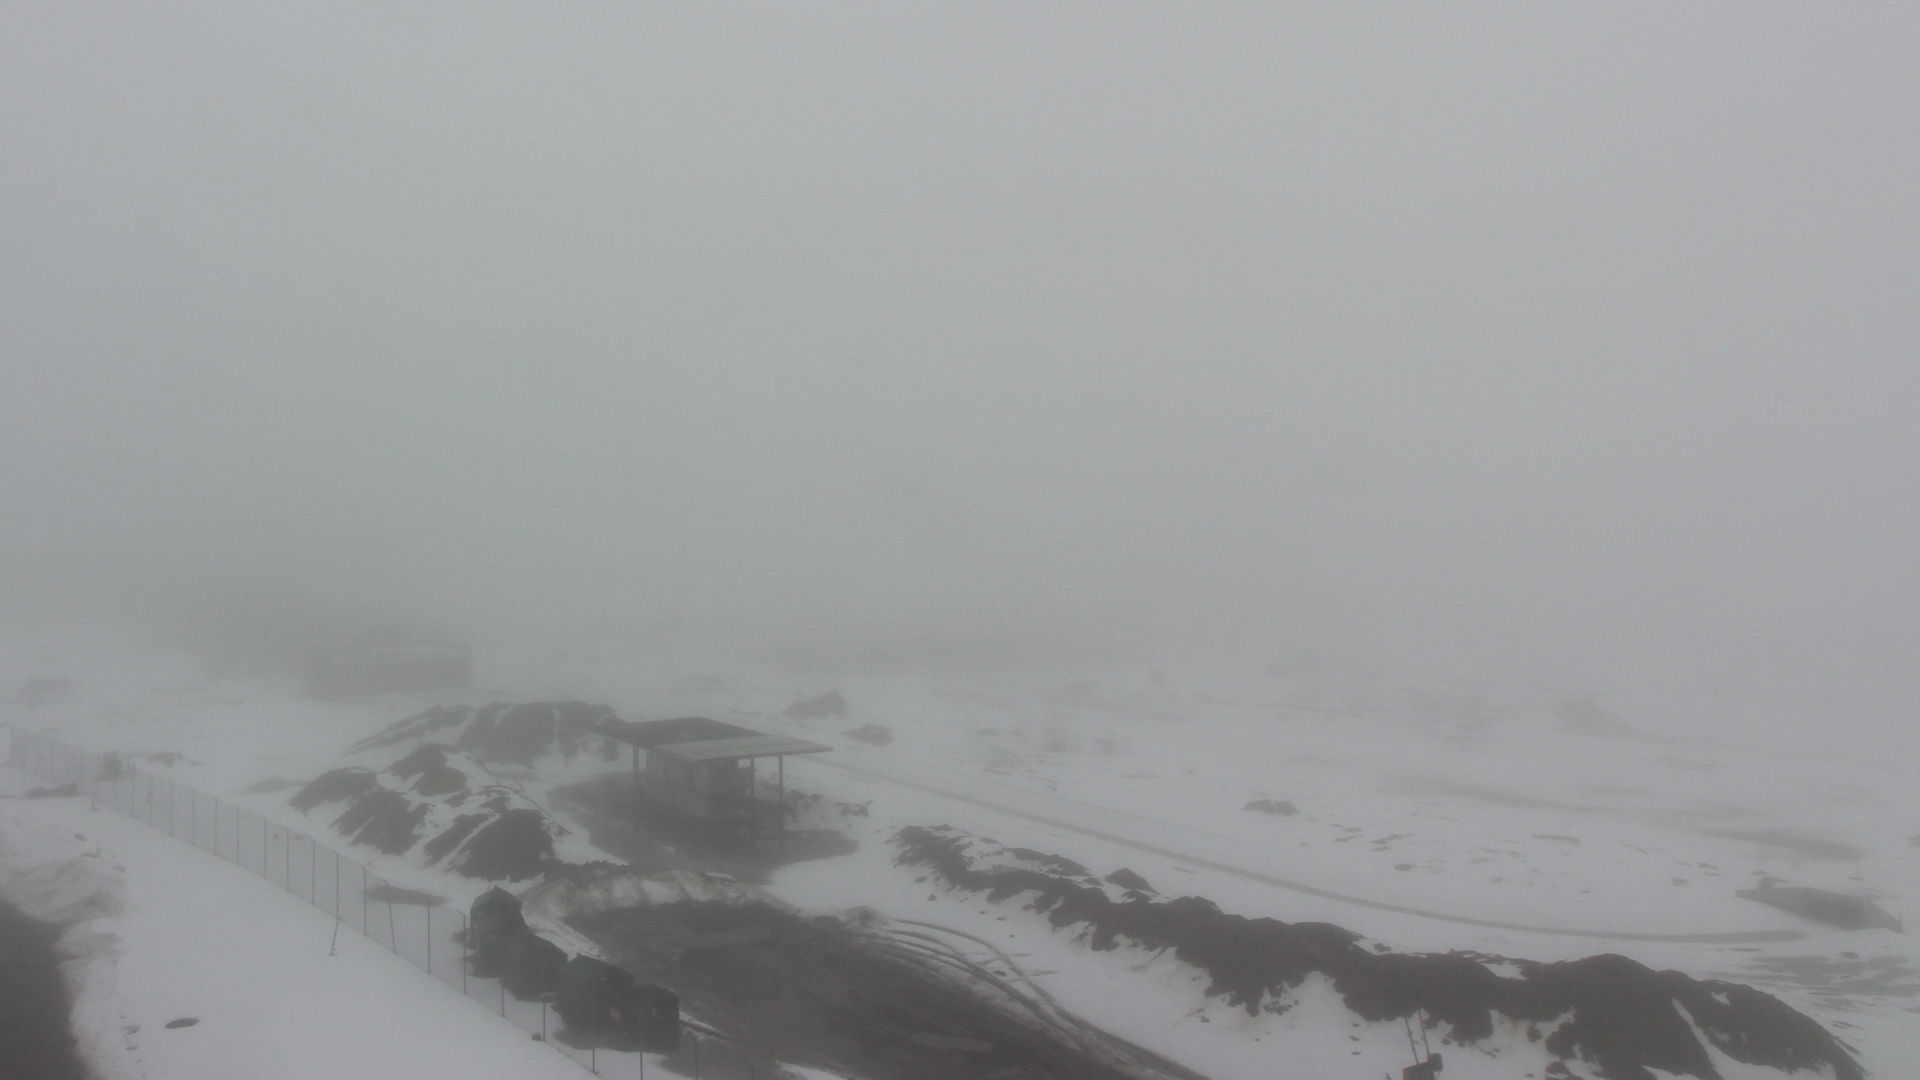
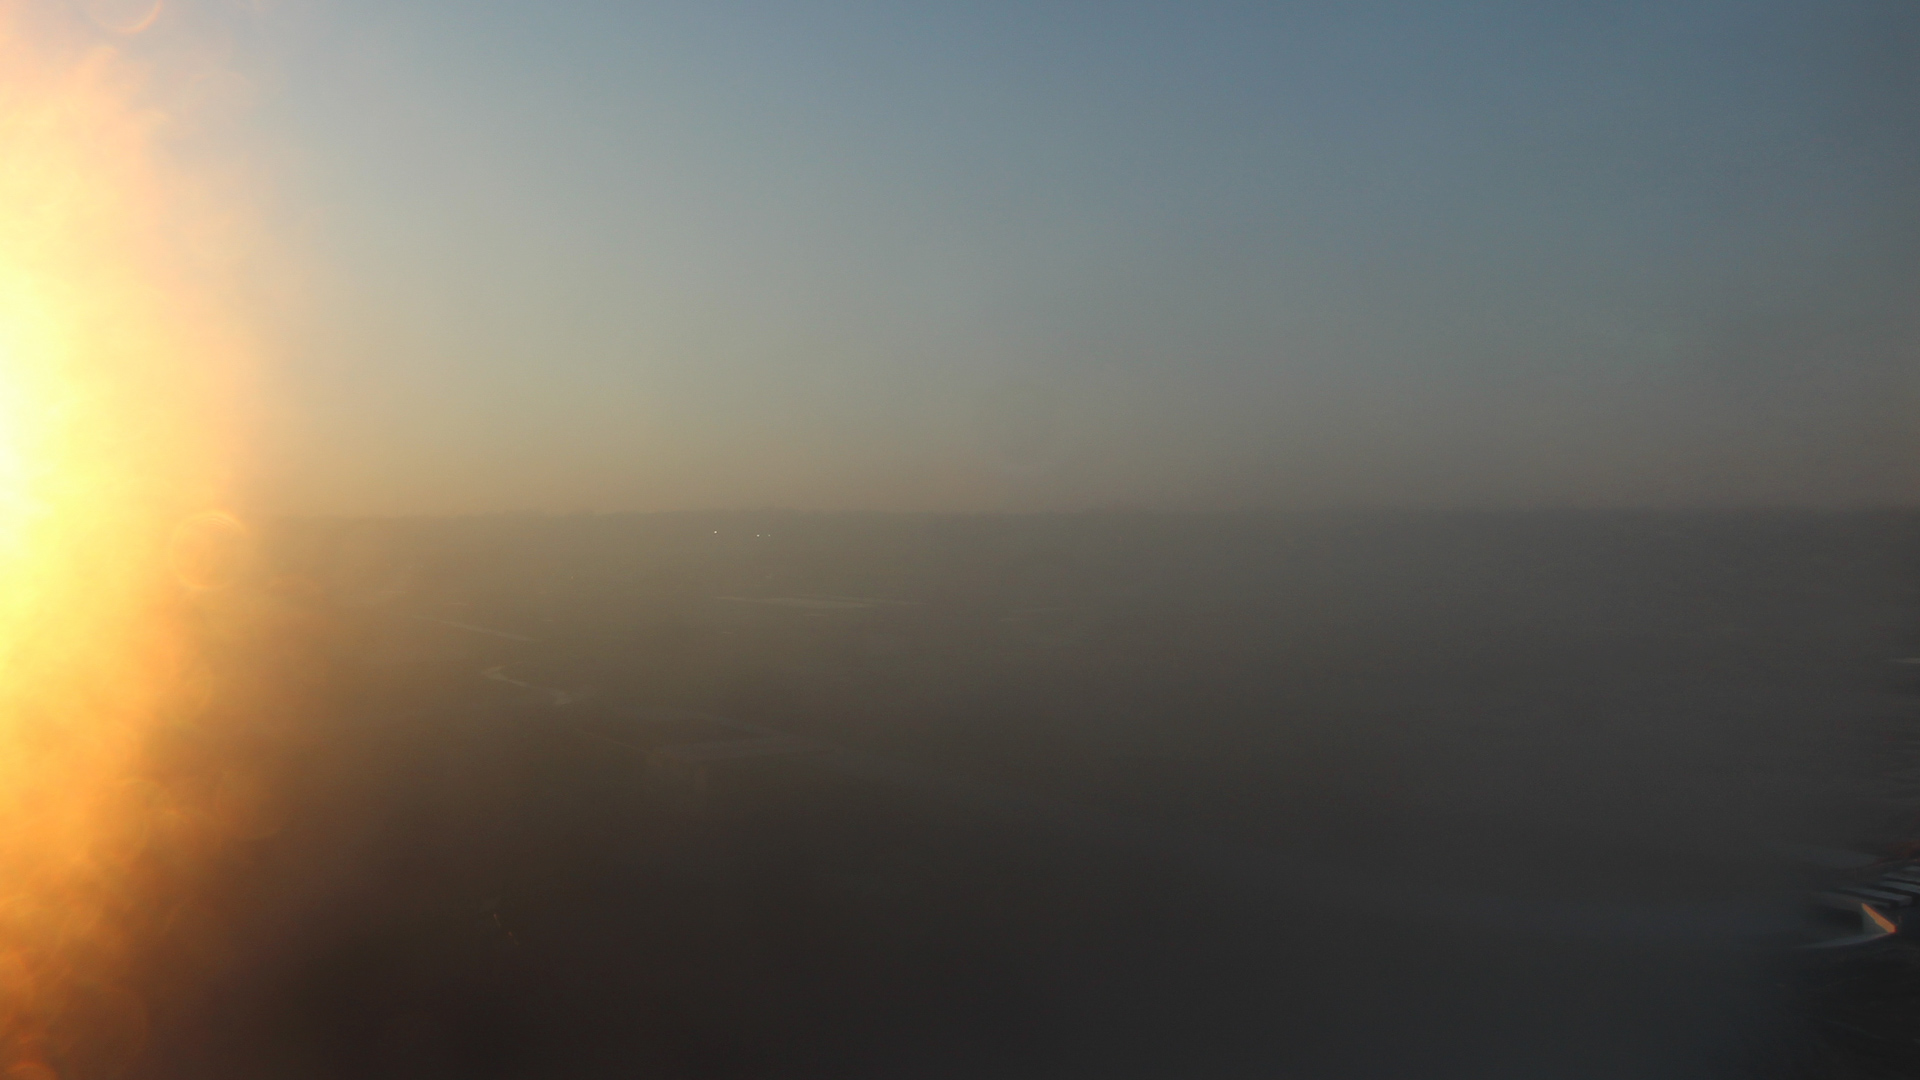
… and some with really bad visibility.
You can see by these preliminary results that the timelapse isn’t very good simply by stringing the photos together. This was going to take some careful processing.
I removed all the photos at night, and that still didn’t make it much better. I ended up removing all the photos that had hard shadows. Fortunately there were a lot of cloudy days.
After some stabilization, the results looked a little like this:
The Takeaways
The Rig:
The camera rig, for the most part, was successful. The camera was not destroyed, and still works today. (It’s currently set up on property in the Grand Rapids area capturing the changing fall colors.) One thing I would change is the ball head. Either wind or human tampering caused the camera to move a little bit. I would use a more heavy duty head to prevent this.
The Video:
The biggest challenge with this project was camera placement. The results, in my opinion, aren’t great. I expected to be able to see a bigger change in front of the camera. Unfortunately, we were limited in where we could put the camera. In the future, I think this would work really well for change that is easier to see.
If you’d like to know more about the test track we were working with, visit the website for The American Center for Mobility.
Let me know what you think of this rig! Feel free to connect with me on my Instagram account. Thanks for reading!